Showing posts with label ideas. Show all posts

Stitching tips from the experts: You

A stitcher posted a question about Blending Filament on our Facebook page recently, and the wonderful community of stitchers chimed in with helpful suggestions. Facebook is wonderful for sharing and discussing, and we welcome all comments and questions. Come on over to our page and "like" us at
 www.Facebook.com/Kreinik.Manufacturing.Company.


Here are some of the tips in response to the question, "How do you keep a metallic from breaking?" It looks like the most important factors are: adjusting tension, using shorter lengths, and making sure you have the right needle. 

  • Shorter threads and larger eyed needle - don't pull too tight and slow down — Bev F.
  • Stitch slower, and use shorter threads. — Karen C.
  • Use a larger needle so that the thread won't get worn from rubbing on the ground fabric. — Beth V.
  • Definitely use shorter lengths! — Anita C.
  • Thread Heaven and short lengths. — Emily W.
  • I always use shorter strands and I lightly wet it with a sponge and that helps a lot. — Anne K.
  • Change your needle - your needle might have a burr in the eye that is wearing the metallic down and you might want to switch to a slightly larger needle - it'll make the hole bigger as you pass the thread through the fabric, making it easier for the metallic to pass through the fabric. — Erica K.
  • Use a wider eye needle this way there is no fraying as you pull it back and forth thru the fabric. — Denise S.
  • I have found using short lengths of thread helps out a lot with the breakage. Instead of Thread Heaven (I have never used it so I have no opinion on it), I just used a damp cloth to dampen the thread and it works wonderfully for me. Also, after every couple of stitches I let my needle and thread untwist by holding my fabric upside down and letting the needle and thread dangle on its own and it untwists for me. — Dawn T.
  • Short lengths, don't pull through the fabric too tight, and maybe a needle with a slightly wider eye…Be gentle and patient with it. — Steff W.
  • I use the Japanese needles with any of the metallic threads - the round eye helps with the fraying. Shorter lengths as previously said and keeping your fingers over the eye so the thread slips less. Then tension - then gentle but firm in your handling. — Robin B.
  • Continually twist your needle with each stitch as you go, which will keep it from twisting then breaking. One of my teachers said this is a Japanese embroidery technique. So, for each stitch or two, twist the needle in your fingers a rotation. Then as you go, in between stitches, keep twisting as you pull it out. You will find your thread rarely breaks if you do this. — Mary M.
  • Watch your tension - I've never had an issue with it breaking. Also use shorter lengths and Thread Heaven (thread conditioner). — Susanne C.
  • Use much shorter lengths to prevent so many twists and the wear and tear on the thread as you sew which can cause it to get caught. — Katrina S.
  • With the Blending Filament, I have found that using shorter lengths helps in keeping the filament strong. It means threading a needle a few more times, but the fewer passes through the fabric you make, the less tugging you are doing on the thread… — Carolyn M.
  • Thread Heaven, short lengths and let the thread "untwist" almost every stitch. — Judy K.
  • With Blending Filament, you can sometimes do all of the stitches without it and then just stitch the blending filament on top. Neat thing about that is that it really sparkles and it isn't twisted with the other thread. — Christine F.
For more about Blending Filament in particular, visit these pages:

Read more...

Frayed at the ends? That’s cool

Consider it “altered threads” — that is, intentionally fraying the end of a thread to create a unique texture. This works for making tassels, creating a fuzzy effect, replicating hair (yes, metallic hair), and other texture choices. Step one is to take your finger and tap the end of the thread to separate the strands. Alternately, you can use a straight pin or needle to gently pull apart the fibers.

If you are involved in card making, scrapbooking, collage, and other fiber art on paper, Kreinik iron-on-threads are the quickest way to add metallic thread embellishments. No stitching required. Here is how we made tassels by fraying the edges of the fusible ribbon fibers:

Fusible Tassel

  1. You will need: Kreinik Iron-on Ribbon, Kreinik Press Cloth, Home Iron or Craft iron turned on to the highest heat setting, straight pin or needle
  2. Cut a length of Kreinik Iron-on Ribbon. Lay thread onto scrap of cardboard.  Using a straight pin, gently comb through the ribbon to separate the fibres, creating a frayed effect.  Continue using a straight pin or an old toothbrush until both ends have been frayed approximately 1 1/4” (or desired length). Do not fray the entire piece of ribbon, just the edges.
  3. Lay the ribbon onto your cardstock or page. Fan threads out with a pin until desired effect is achieved.  Press with your hot iron, using the press cloth (either Kreink’s Adhesive Press Cloth or Non-Adhesive Press Cloth) to protect your iron plate.
  

Read more...

Need another pair of hands?

Komas come to the rescue.

What is a Koma?
This wooden spool serves as an extra "hand" to hold threads you are couching on the surface of your fabric or canvas. Originally used in Japanese embroidery, komas are used world-wide by stitchers of all ages and skill levels. Kreinik's Komas are made in Ohio, turned with West Virginia and Ohio wood.

What is couching?
Couching is a surface embroidery technique in which you tack down a decorative thread with an invisible, coordinating, or contrasting thread. These tacking stitches can be either side to side, down the middle of your couched thread, or a decorative stitch such as Herringbone, Elongated Cross, etc.

Couching is a traditional Japanese embroidery technique that has become popular in all needlework and crafts today, including counted thread, needlepoint, quilting, crazy quilting, surface embroidery, stumpwork, goldwork, crewel, and samplers. Komas are an easy way to hold — and direct — your couching threads as you stitch.

Which threads can be couched?
Couching is an excellent way to use threads that are too thick to pass through fabric or canvas, however you can couch any decorative thread: real metal, metallic, silk or ribbon. Kreinik threads you can couch include Japan #5, Japan #7, 1/8" Ribbon, 1/16" Ribbon, Facets, Petite Facets, Micro Ice Chenille, Heavy #32 Braid, Canvas #24 Braid, Medium #16 Braid, Silk Serica, and Kreinik Real Metal Threads. Kreinik threads that you use to couch these decorative threads include Silk Bella, Silk Mori, Silk Couching Thread, Japan #1, Cord, Blending Filament, Very Fine #4 Braid, Fine #8 Braid. For more information on these threads, visit www.kreinik.com.

Why does the koma have square ends?
They prevent the spools from rolling around or off your project as you stitch.

How do you use a koma?
Wrap your decorative thread around the barrel of the koma, then set it on your needlework to unwind the thread as you couch. Move the koma as you work to keep your thread in proximity to your stitching area. This gives you greater control over your couching, and the wooden spools won't roll off as you work.

Why are komas sold in pairs?
Having two komas allows you to couch more than one thread at a time. This creates exciting embroidery effects and expands your creative options: imagine the dimension you can achieve by layering fibers like round Fine #8 Braid on top of flat 1/8” Ribbon, or placing them parallel as in two rows of smooth gold Japan #5. You can create new textures, trims, borders, and edgings by couching multiple threads, and komas make couching easier.

Read more...

How-to: 10 Tips for Beading with Kreinik Threads

Earrings and necklace as seen in "Betsy Beads"
"Threads become the backdrop for fun, elegance, or a bit of glitz." - Brenda Franklin

"Betsy Beads" is the new hit book from XRX Books (http://www.knittinguniverse.com/Beads) featuring stunning bead knitting projects, including the design in the photo shown here. It isspreading interest in bead knitting, one of the most beautiful ways you can use your knitting skills for creating intricate jewelry and accessories. Search "Kreinik" on http://www.ravelry.com and you will find additional bead crochet and bead knitting designs, all stunning and most — surprisingly — easy to make. Do you want to learn how? This blog will give you 10 Tips for Beading With Kreinik Threads.

You may not think that the thread shows much in beading, or matters much, but it does. We asked designers what they thought of Kreinik threads, and they offered helpful tips to share with you. Whether you're getting into bead crochet, bead knitting, surface embroidery, or other types of beadwork, Kreinik metallic and silk threads offer some benefits that you just can't get with other threads, such as:

1. 200+ colors from which to pick — "For beaded embroidery, the thread color should match the fabric or the beads," notes designer Kim Kotary. With the large range of Kreinik shades, you can find a color to match any bead.

2. Did we mention 200+ colors: With such a wide range, you have more complementary color choices when working a design where the thread shows around the beads. "Kreinik threads are SO PRETTY," says designer Vashti Braha.

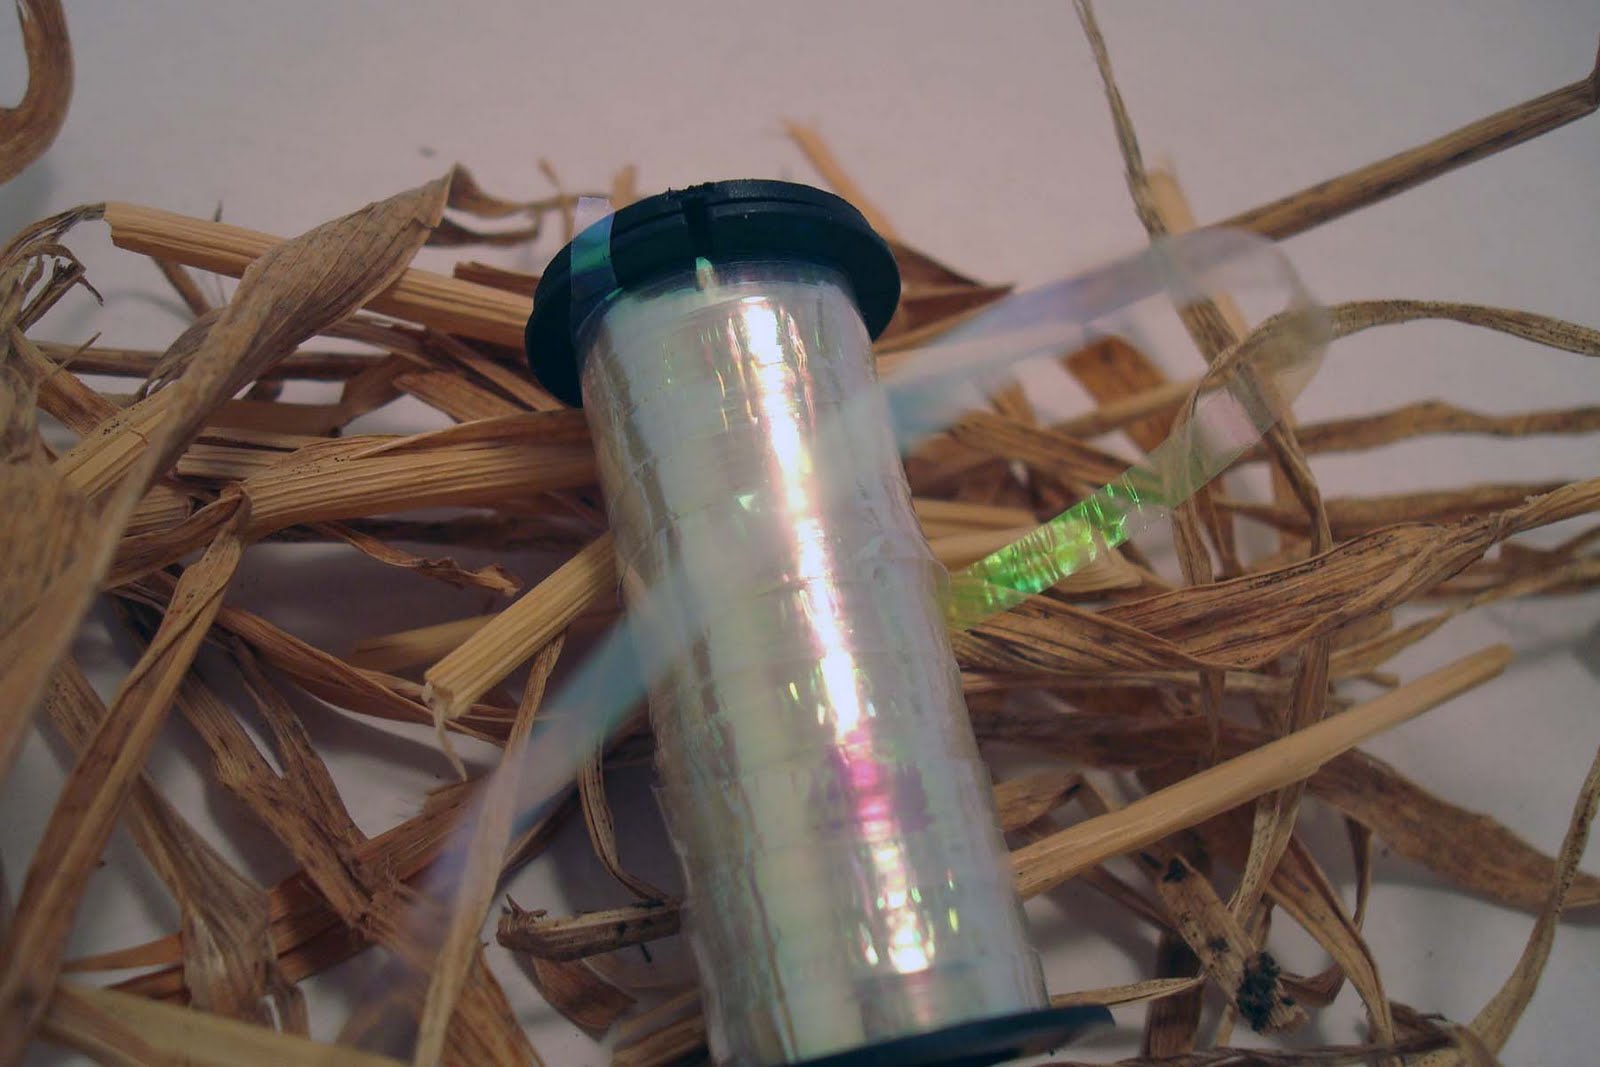
Bead Stew "Fire Walk with Me" by Earth Faire
3. Metallics add elements of light to designs — "it catches the light" says designer Maria del Pinto, and it complements the color depth of dichroic and Venetian glass beads, for instance. "Metallic threads add a wonderful shimmer to the beaded knit," notes designer Brenda Franklin. She adds that a transparent bead on a metallic thread will have the shimmer and glow you look for in a silver-lined beads (lined beads often have smaller holes and lose their glow). Designer Betsy Hershberg says Kreinik Cable in particular "is a great choice for a true metallic jewelry look."

4. Kreinik metallic braids, cables, and ribbons are strong: Brenda Franklin notes in her book Beaded Knits Vol. 1 that "glass beads add weight, so the thread that is used for beaded knits must be able to support this extra weight." Brenda often uses Kreinik #8, 12 and 16 Braids for her projects. Vashti Braha uses the metallics "when I need just the right way to feature a dichroic glass pendant. Kreinik stands up to the kind of metallic color depth, and the sheer weight of the glass pieces."

Reversible Bracelet by Brenda Franklin
5. Kreinik silk threads are strong. Silk is natural and one of the strongest fibers you can find. Betsy Hershberg had this to report after trying Kreinik Silk Serica for projects in her book, Betsy Beads: "The silk is a joy to knit/bead with. I'm not sure if I can accurately describe one of its favorite qualities for me as a knitter, but it has to do with a certain amount of "stickiness" it has that allows it to hold for a very even tension i.e., the stitches stay the same size rather than slipping as a rayon thread might. And don't even get me started on the color range..... I am thrilled to have discovered it." About Silk Serica, she adds, "I just love the sheen and the hand of the silk and it stands up really well to the friction of being strung with quite small beads. The stitch definition is beautiful. And it is SO strong!"

6. Kreinik threads are flexible, won't kink: From Earth Faire, a bead and jewelry kit company, "These are very easy threads to use -- unlike most metallics, I haven't found in these a tendency to kink -- they lie smoothly and work well with just about all of the size beads that we use."

7. Kreinik metallics are hand and machine washable: Cotton threads tend to stretch, but with the Kreinik metallics, "stretching when wet is not an issue," notes Earth Faire.

8. They come in a variety of weights/sizes: About Kreinik Tapestry #12 Braid, for example, Vashti notes, "This thread seems to bridge sizes #10 and #20 cotton threads." Kreinik has six sizes of metallic braid, two sizes of metallic ribbon, and three sizes of silk thread, which means you can pick from several options to either match bead sizes or to create your own yarn/thread by combining with other thread types. Some of the thinner threads, like Kreinik Blending Filament, Very Fine #4 Braid, and the Machine Sewing Threads work well as carry-along fibers.

9. You can get thread in a variety of spool sizes: Since Kreinik makes their own threads, we can spool or cone any amount. Working on a large project, for instance? Choose a 50m cone, or special-order a custom size. The standard Kreinik spool sizes - from 10m to 20m on a spool — are ideal amounts for most jewelry projects.

10. Kreinik threads are available in stores or from online sources: that means you can always get what you want. Visit the Store Locator on http://www.kreinik.com, or buy online at http://www.kreinikmall.com.

Examples of what you can make:

  • Beaded earrings
  • Beaded brooches
  • Beaded necklaces
  • Beaded ornaments
  • Beaded pendants
  • Beaded purses
  • Beaded socks
  • Beaded embroidery
  • Beaded trim for garments, home decor, fashion accessories

What to use

METAL/STEEL HOOKS AND NEEDLES:
Consensus among bead knitters/crocheters is that metal hooks and needles work better than plastic or wooden ones. From designer Maria del Pinto: "You need a metal crochet hook because the plastic ones have surfaces that catch the threads which can ruin the finished look of a piece." Gwen Blakley Kinsler, founder of the Crochet Guild of America, adds, "Depending on the thread, I use a steel hook, sizes 6, 7 or 8."

KREINIK METALLIC THREADS:
  • Fine #8 Braid is great for crochet and fine needle lace work, and works well with size 11 seed beads.
  • Fine #8 Braid is frequently used by Earth Faire for beaded jewelry: "We have been using this thread with many of the Jewelry patterns from Brenda Franklin (see their "Jewelry Creations"  on www.earthfaire.com web page). The color and sheen is fabulous and the hand as one works with it is extremely pleasing."
  • Tapestry #12 Braid is another favorite: "it is slightly heavier than the Fine Braid but we like its strength and it works with all but the tiniest of beads (and even sometimes with those)," notes the team at Earth Faire.
  • Medium #16 Braid: "Very firm knit structure, very strong braid that will support larger beads well," reports bead knitting designer Brenda Franklin. Some of the high lustre colors can be rough against skin, however.
  • Heavy #32 Braid and the 1/8" Ribbon are thicker metallics, both equivalent to a fingering/sock yarn, a Light Sport Weight and a size #5 cotton crochet thread, according to Vashti. Beads: "6/0 E-beads" aka "large seed beads" work with this size, but these thicker threads can be rough against skin.
  • Blending Filament is a soft, thin, tinsel-like thread. Rather than using the filament to string beads, we recommend that you use filament as a carry-along thread, worked with another thread type at the same time. It will add a subtle metallic shimmer.
  • Fashion Twist and Fine Twist: These two Kreinik Machine Sewing Metallic Threads are thin enough to use as a carry-along thread in bead knitting and crochet. They are strong, but also anti-microbial, offering added hygienic qualities for beaded garments. See the HeartStrings Fiber Arts knitting pattern #S33 "Glitz and Beads Socks" here: http://www.heartstringsfiberarts.com/s33.shtm with video tutorial here: http://jackie-es.com/the-designing-day/a-fashion-twist-with-kreinik-metallic.php

Spyro Gyro earrings by Brenda Franklin
KREINIK SILK THREADS:
  • Silk Bella: "Wow, this is like tatting thread," notes Vashti, ".5mm hook seems just right. I guess equiv. to #40 or #50 crochet thread."
  • Silk Serica creates soft but strong stitches. "Silk Serica is fabulous with the beads," notes Gwen, "size 8 or 10 or larger [bead] is recommended because it [Serica] is thicker."
  • Silk Serica or Silk Bella offer a smooth thread for handling delicate beads like pearls.
  • Silk is a natural animal fiber, so silk thread complements creations with natural stones.

BEADS:
  • pearls
  • natural stones
  • semi-precious stones
  • glass: dichroic, Venetian, Czech, Delica, seed beads
  • crystal beads, Swarovski and other
  • sterling silver, gold, gold-filled, metal beads
  • bugle beads


Where to get more information or inspiration


BOOKS:
  • Betsy Hershberg, Betsy Beads, XRX Books
  • "Kreinik threads could be used in place of any others these authors recommend," notes Gwen Blakely Kinsler: Bethany Barry's book, "Bead Crochet" Interweave 2004, Susan Lutz Kenyon, "Beaded Beauties to Crochet" by Leisure Arts, 2004, "Crochet with Beads" by Hazle Shake , Design Originals,2 005, Lily Chin, "Knit and Crochet with Beads"
  • Brenda Franklin, "Beaded Knits Jewelry and Accessories" volumes 1, 2 and 3.
  • Beading on Fabric by Larkin Jean Van Horn from Interweave Press

WEB SITES, BLOGS, and DESIGNS:
http://www.crochetqueen.com/
http://designingvashti.blogspot.com/
http://www.youtube.com/watch?v=qu_hL2hOBhs
http://www.necklaceart.com
http://www.bfdesigns.on.ca/INDEX.HTM
http://www.heartstringsfiberarts.com/s33.shtm
http://jackie-es.com/the-designing-day/a-fashion-twist-with-kreinik-metallic.php
http://earthfaire.com (look for the Bead Soup kits)
http://store.vogueknitting.com/p-489-beaded-top.aspx
http://www.knittinguniverse.com/Beads
http://www.studiobknits.com/
http://www.myrawood.com/

Read more...

Not your grandma's needle case

Want something distinctive? Make it yourself! Customize it with your own colors and put your unique spin on it.

That is the mantra of DIYers everywhere. Crafters and needleworkers have been expressing themselves through thread colors, stitches, patterns, and finishing ideas for, well, forever. So when we saw this unique twist on a needle case by designer Brenda Franklin, we asked if we could share it with others to inspire them (and maybe show off the cool use of one of our threads). She said yes, so we are "pinning" this on our blog-board as One Creative Concept.

Here's the story about the needle case from Brenda:

"It is a test tube, with the warp glued onto it and the threads, in this case a variegated silk and [Kreinik] ombre twined around the case. I did a variety of patterns with the weaving, which you can see detailed in the close up jpg. It probably took 4 to 6 hours to do…I did a beaded edge at the top of the weaving as I finished off the warp threads and did a peyote stitch to bead the cap with beads that reflected the colours of the threads used."

Super creative, Brenda, and quite gorgeous! By the way, Brenda is a Canadian cross stitch designer who also creates bead knitting jewelry and patterns. Check out her web site here: http://www.bfdesigns.on.ca/

Have you created something unique lately with Kreinik threads? We would love to see it! Email us at info@kreinik.com or post to our Facebook page: www.Facebook.com/Kreinik.Manufacturing.Company

Read more...

Which scissors should you use with metallic threads?

 Word on the street is that metallic threads can dull your scissors, so you should always keep a separate pair of "metallic only" scissors, labeled as such. Is this true? As a metallic thread maker, we can officially say "Yes."

Metallic threads are denser than other types of thread and will dull a plain blade faster. We recommend using a serrated-edge scissor for your metallics. This means that the edge has high points and tiny ridges - like teeth - to "grab" your material as it is cut. It will help you control the cut, give you a strong cut, and make you happier in general. Anything that makes life easier makes us happy, right?

Think of it this way…Whether in the kitchen or in the woods, you want to use a plain blade for some things and a serrated blade for others. A serrated-edge blade, for instance, is often used to cut dense materials like rope, canvas, vines, leather, or other thick, fibrous material. In the kitchen, use a serrated knife to cut tomatoes, celery, bread, or other fibrous foods. Choosing the right tool for the job makes the job easier and the result better.

In your sewing or needlework basket, you may not need to write "only for metallics" on the blade, but it is a good idea to mark the serrated scissor in some way to differentiate it from smooth-edged scissors. You can usually feel the serrations, but if you need a quick, at-a-glance marker, engrave a "S" or put a small red dot on your serrated pair. Here at Kreinik, we use a S in our item codes to indicate a serrated edge.

What about sharpening a serrated-edge scissor? Well, the good news is that serrations tend to stay sharp longer and may not require sharpening as frequently as a plain edge. Since the serrated scissor is not smooth, the serrated portion of the blade will stay sharper for a longer time because the entire blade is not coming in contact with the surface to be cut. So if you use your serrated-edge scissor for cutting metallic threads, you should be fine for many years.

Kreinik carries scissors of all shapes and sizes in straight-edge and serrated blades. You can get small embroidery scissors or large dressmakers' shears with serrated edges. So as you buy scissors, consider what you want out of a scissor, how you will be using it, and what you will be cutting.

Check out the scissor pages here for more information and scissor photos: http://www.kreinik.com/shops/Premax-R-Scissors/


Read more...

Which needle should I use?

Recently emailed question: “What needle I should use for hand embroidery on quilting cottons using a #4 Metallic Braid and #8 Metallic Braid?”

Needle selection is a major contributor to your happiness factor, whether you are hand or machine stitching. Using an incorrect needle will cause a thread to fray, knot, and otherwise misbehave. Many of the problems people have with thread can be solved by needle selection. The problem isn't necessarily the thread, but rather a too-thin needle, a needle with a bad eye, a needle with a too-small eye, or something similar. So "which needle should I use" is a great question.

The Education section on www.kreinik.com features an article about the best needle size for each Kreinik thread in cross stitch and needlepoint (click here for that chart: http://www.kreinik.com/shops/Needle-Selection-Chart.html, but we didn't have a chart for those of you doing embroidery, crazy quilting, or quilting on cotton fabrics. So we asked crazy quilt expert Allison Aller to list which needles she uses with Kreinik threads on cotton quilting fabric. Keep this chart handy:

Needle Sizes to use with Kreinik Metallic Threads

Allie says: As a rule, I use needles with eyes that are larger and shafts a bit thicker than might be needed for regular threads. Because these are metallics, I don’t want any tension to stretch the thread or too small an eye to cause them to fray as I am stitching with them. This also makes for easy threading — you don’t want a fight when you are threading up.

  1. Kreinik Cord—is very fine, but still I use a #8 Embroidery needle. I don’t want any tension to stretch the thread or cause it to fray, so I use a slightly bigger needle than I normally would for this weight of thread.
  2. Kreinik Very Fine #4 Braid: #22 Chenille. Again, the eye is larger than needed but the shaft of the needle makes a large enough hole that there is no resistance to the thread. This size needle is easy to thread as well—you don’t want to fight that.
  3. Kreinik Fine #8 Braid: #20 Chenille is good for this size.
  4. Kreinik Tapestry #12 Braid: 18 Chenille
  5. Kreinik Medium #16 Braid: #18 Chenille
  6. Kreinik 1/16” ribbon: I like a #18 Chenille or Darner.
  7. Kreinik 1/8” ribbon: #14 Chenille or Darner
Your goal is to have a clean (not rusty), fully operational (no burrs in the eye) needle with an eye large enough to accommodate the thread, but not too large that it creates too big of a hole in your fabric. Experiment on your own pairing Crewel needles, Tapestry needles, Chenille needles, and Darner needles with Kreinik threads and your chosen fabrics to find the perfect fit. For a helpful chart showing the difference between these needles, visit www.colonialneedle.com/html/about-needles.html

For more info on Allison Aller, visit her blog at http://alliesinstitches.blogspot.com/ or check out her new book from C&T Publishing "Allie Aller's Crazy Quilting: Modern Piecing & Embellishing Techniques for Joyful Stitching."

Read more...

What is a Japan Thread?

We recently introduced four fabulous new colors in Kreinik Japan #7 thread. That prompted a few questions, such as: What is a Japan Thread, and how do you use it?

A Japan Thread is a gimp, meaning a wrapped thread. Historically, Japan Threads began with gold, silver and copper pounded down to a thin leaf, then wrapped around a core fiber and couched on fabric for surface embroidery embellishment. Today Kreinik makes Japan Threads that have a percentage of real metal in them, but are primarily synthetic so that they are long-lasting, non-tarnishing, inexpensive, and easy to use. They have a beautiful, bold, bright finish that resembles real metal.

How do you use a Japan Thread? Since it is a wrapped thread, needleworkers couch it onto a fabric or canvas rather than stitch in and out of the ground material. Couch with a coordinating color of very thin Cord, filament, or Japan #1 size. For interest, couch with a contrasting color of silk thread; just think of the beautiful patterns you can create.

You can also use Japan Threads for other techniques as well, such as cord making, tassel making, crochet and knitting (as a carry along thread), temari, Japanese embroidery, and crazy quilting. We asked our friends on the Kreinik Facebook page what they would do with Japan thread, and here are their creative ideas:

  • Barbara V: I love adding Japan thread to my crochet yarn for that subtle sparkle. Though other times I do a surface crocheted slip stitch to add some glitz when the piece is almost finished.
  • Beth V: I love these colors for my canvas work!
  • Suzanne W: I think these would be awesome in a halloween needlepoint!
  • Cindy W: Love adding color and sparkle to my cross stitch pieces.
  • Carleen M: They would make spring flowers sparkle in an embroidery project!
  • DeAnn C: Ribbon Candy Stripes!!!!
  • Heather S: use it for sparkle in my fantasy cross stitch of my dragon
  • Erica K: I've got a Japanese kimono needlepoint canvas that is just dying for a fibre like that.....
  • Terri P: Definitely would use in a modern-styled personal sampler -- to add both drama and light to the story of my life!
  • Robin B: accents in crazy quilting embroidery!
  • Julie O: I'd like to use it as an accent in both my crochet and cross stitch. It would be gorgeous used to accent a pair of my daughter's capri's too!
  • Linda K: Beautiful colors...look delicious, would use in canvas embroidery. Am designing my own these days and would love to try them in my newest floral design.
  • Jane W: I would use some of the colors in a border. Wouldn't that be a marvelous finishing touch?
  • Carol Y: I've got an abstract needlepoint canvas awaiting just this type of thread! Love them! Want to stitch with them!
  • Lynn M: I would use it to enhance my stitching
  • Alessandra D: I would use it to illuminate my embroidery
  • Doris D: I would blend floss and/or replace floss with Japan Threads to make my stitching projects stand out!!
  • Connie T: I would use it with my cross stitching to give the piece some dazzel.
  • Cheryl S: I would use these threads on my Christmas ornaments that I needlepoint to give them that extra pizzazz. I have in fact already used the Kreinik Japan Gold in several of my ornaments and would really enjoy using other Kreinik Japan's bright colors in my needle pointing.
  • Bev F: My family calls my using Kreinik threads in all my cross stitch -- "bev-ing it" --Cause I like sparkle and shine.
  • Laura B: I would couch these threads to show off their true beauty, simply anchor them down in an ornate monogram for gifts to family and friends.
  • Dee C: I would highlight my stitches enhancing my project! I love using Kreinik!!!!!!!
We love the word "illuminate" to describe why you would use a metallic like Japan Thread in needlework; the beautiful color and metallic sheen adds so much interest to a project. Have fun and experiment with these threads.

To buy Japan Threads, visit your local needlework store, your favorite online store, or www.kreinikmall.com. Join us on Facebook to share ideas, photos, thread give-aways, and behind-the-scenes news from Kreinik. Click here to friend us on Facebook.

Read more...

A toast to metallics

Guest Blog from Janet Perry

Note from Kreinik: We are so excited to have an article and needlepoint stitch guide from blogger and designer Janet Perry of Napa Needlework and http://www.nuts-about-needlepoint.com. Often we fall in love with a painted canvas needlepoint design, but don't know where to start when it comes to actually stitching it. Stitch guide writers like Janet tell you which threads and stitches can be used to bring a canvas to life. Thank you, Janet for sharing this project featuring Kreinik's new Easter Grass plus Kreinik Treasure Tape and Iron-on Thread. Like her, you can use a variety of materials on a needlepoint canvas. Don't be afraid to experiment and have fun!

Kreinik makes a wealth of items that can be used to give needlepoint a whole new look. Using this painted canvas of a glass of beer, I used Kreinik threads, embellishments, and some items from my stash to make a distinctive needlepoint design.

Foaming Beer Glass (CT145) Canvas from KS Designs
Stitch Guide by Janet M. Perry

Here’s what you need:
3 skeins Kreinik Silk Mori 5097 (blue)
1 skein brown paper packages Silk & Ivory 93 Red Hot (red)
1 spool Kreinik Silk Serica 7173 (cream)
1 spool each Kreinik 1/8” ribbon: 5555 (cream) and 100 (white)
1 spool Kreinik Easter grass 1/8" size
1 spool Kreinik Tapestry (#12) braid in 5720 (gold), 032 (white), 191 (cream)
1 spool Kreinik Iron-on Ribbon 003 (red)
1 Kreinik Teflon Press Cloth
1 tube Kreinik micro-beads in gold
1 package each Swarovski hot fix crystals crystal, 2mm, 3mm, 4mm
1 package Kreinik Treasure Tape stars
1/2-inch shank button from your stash
home iron or craft iron

Instructions:
1. Borders: Padded Gobelin using Silk & Ivory. Stop the padding stitches one thread before each corner.
2. Glass Base: Basketweave using Easter Grass. This thread is very stiff, so use short lengths and pull each stitch tightly.
3. Beer: Four-way Continental skipping occasional stitches in order to add in hot fix crystals
4. Head: Four-way Continental using Silk Serica
5. Foam: French Knots done in several passes; each pass covering more of the foam. The first and second passes are with the two 1/8” ribbons. These should cover almost all the foam. The last two passes should use the white and cream Tapestry (#12) braids. These fill in the remaining area in the foam and build up the foam by being on top of the existing knots. These knots do not have to be perfect; they can be loose, use different numbers of wraps, and face different ways. If you like, you can add more knots using other white and cream threads. If you want to add highlights use Kreinik Tapestry (#12) braid in white (100) to add a few on top of the other knots.
6. NOTE: Before stitching the background, place the smallest size star from the Treasure Tape sheet over the star on the canvas, you will be stitching around it.
Background: Double Trellis using six strands of Silk Mori. Stitch over the red streamers and over the white round. Leave the very center hole of the white round open and do not stitch the small white dots scattered over the background.
7. Button: Using a shank button about ½” in diameter, attach it to the open area of the white dot.
8. Star: Replace the star if needed, and peel off the protective red tape. Working over a paper towel to catch the excess, sprinkle gold micro-beads onto the star. Tip the canvas up and brush off the excess. Press star gently to be sure everything is secure.
9. Dots in Background: Using the 4mm crystals and the hot fix gun, attach these crystals to the small white dots on the background. Follow manufacturer’s instructions to attach.
10. Bubbles in beer: Use the 3mm and 2mm crystals and attach these to the stitches you skipped on the beer. Follow manufacturer’s instructions to attach. I found the 3mm crystals much easier to attach. If you like use all 3mm crystals.
11. Red Streamers: There is a red streamer on either side of the glass. These are applied after everything else using the Kreinik Iron-on ribbon. Use a dry iron and a Teflon press cloth. I cut the ribbon, then made the twists and ironed them on.

End note: We love how Janet used the metallic gold to make the beer look wet. Also note the opal ribbon Easter Grass used for the glass; it lets the canvas color (white) come through while giving a glassy look. Use metallics like these to recreate things in life that are naturally sparkly. Get more stitching tips, design ideas, and news from Janet's blog http://www.nuts-about-needlepoint.com and http://www.napaneedlepoint.com

Read more...

Terri O Videos

Kreinik has teamed up with Terri O to make two educational videos using Kreink's Bag 'o Bits and Iron-On Threads. See how easy and fun our threads are to use. Click on the links below to see these new videos.

Read more...

5 Tips on Stitching with Silk Threads

Silk threads are known simply as the most beautiful fibers you can use — in clothing, draperies, and needlework. This natural fiber gives a brighter sheen, offers richer colors, and transforms even a basic design into something more beautiful. Needleworkers have been using silk threads for centuries, and today you have the opportunity to experience this versatile fiber for your own projects. Here are a few tips and techniques to get you started happily stitching with silk.

1. Cover the rough edges of your canvas or fabric before you begin stitching.
It is a small step with huge dividends; your beautiful silk thread will be ruined if you snag it on jagged edges. Simply cover needlepoint canvas edges with tape, or turn fabric edges under with a running stitch. If you are also using wooden stretcher bars to hold your canvas, sand away any burrs or chipped spots.

2. To keep silk (or any thread) from snagging on rough skin, simply get into the habit of using a hand cream.

A natural, non-greasy cream is safer when handling fibers and will make handwork much more pleasurable. Doug Kreinik, owner of the Kreinik thread company, uses a homemade olive oil mixture to exfoliate and moisturize his hands. Do this as a regular routine, such as at bedtime, and your hands will be softer when stitching (just don't use the oil and then immediately stitch). Just get into the moisturizing habit; your hands will look younger, feel soft, and your stitching will look better.

3. Don't just pick up any needle you find in your pincushion and start using it with your sublime silk fibers.

Needles - and needle size - matter more in making a thread "behave" than any other factor. A needle with too-small of an eye or a nick in the eye will cause a thread to fray. A rusty needle can discolor fabric and thread, and also cause abrasion on your ground material which will tear up your thread. A needle that is too thin won't open the hole in the canvas enough to let the thread pass through easily. When stitching with a smooth and lustrous fiber like silk, use a quality, clean needle that is large enough to accommodate the thread.

4. Maximize the natural luster of silk by avoiding short cuts.

That is, don't rush it. We all want to stitch quickly and get the instant gratification of a finished project. However, impatience never creates beautiful needlework. You spend money on the canvas, threads, finishing, not to mention give your time in placing each stitch, so slow down and enjoy the experience. For example, use short lengths (like 15 to 18 inches) to reduce the number of passes through the canvas and thus keep the thread from looking worn. Let your needle dangle every so often to undo the natural twisting that occurs during handwork and thus avoid knotting. Lay your stitches neatly and evenly to maximize coverage and thus offer more surface for the beautiful light reflection of silk.

5. Don't fear the cleaner.
We often think of silk as being delicate, but it is actually one of the strongest of all natural fibers. Silk also has a reputation for being high-maintenance, often due to a 'dry clean only' label. In reality, yes, you want to clean your silk (silk blouses, silk draperies, silk stitchery) carefully to maintain a long and lustrous life. Dry cleaning is recommended for optimum maintenance, but this care and cost factor shouldn't deter you from using silk. You know how disappointing it is when you wash a silk blouse and it loses its luster; it is worth the effort and money to care for your possessions and creations. Unless you have created a silk-needlepointed blouse, most likely you won't need to have your project dry cleaned often. Unless you stitched outside while gardening in the dirt, your needlework should start out clean. Simply interview your local dry cleaner on how they clean heirlooms to find someone you can trust. Can you wash silk? While dry cleaning is preferable, you can hand wash most silk in lukewarm water with a mild, natural soap. However, no thread on this earth is completely colorfast, so do a spot test. Also keep in mind that water, heat, agitation from a washing machine, wringing, or friction with other textiles can all dull the natural luster of your dreamy silk.

Silk is a natural fiber with a translucent cellular structure, which allows it to absorb dyes deeply and to reflect light to a high degree, giving the finished project a pure color and a beautiful luster. When worked in needlepoint, cross stitch, quilting, and embroidery, silk has a bright sheen unrivaled by other threads. Its loft provides voluminous coverage, and its softness spoils your fingers. Silk threads can be used in all stitches, in all types of needlework, to make all projects brighter, more colorful, richer-looking, and simply more beautiful. So relax, use these easy tips, and treat yourself to silk thread for your next project.

For more information:

Read more...

Hot-Wire™ How-To: Make a Dragonfly Brooch


Note: We thank Pat Winter for sharing this amazing project featuring Kreinik’s new wired Braid, Hot-Wire™ (update November 2017: now called Wired Braid™). She designed the dragonfly to be a dimensional embellishment for a quilt project, but it makes a perfect stand-alone jewelry piece too. To learn more from this talented designer, follow Pat on her blog http://gatherings100.blogspot.com/

Gather these supplies:

- spool of Kreinik Wired Braid™ thread
- sheer fabric
- clear drying fabric glue
- matching fine metallic thread or Kreinik Blending Filament
- petite seed beads and tiny sequins are optional

Instructions:

1. Begin by choosing the Wired Braid™ and sheer fabric of your color choice. The color list for Kreinik Hot-Wire™ can be found here: http://www.kreinik.com/shops/Wired-Braid.html

2. Either use a wing pattern or free-form as I did to bend thread to form two lengths for longer front wing and two lengths a tad shorter for back wings without cutting thread (see photo #2).

3. As you can see in photo #3, the first two are just a bit longer. Twist one large and one small wing to the other side to form a set of four wings. Longer wings go on top. Take 1/2" of Hot-Wire™ and secure in center. This will be later hidden with beads.

4. Using small brush, apply clear drying fabric glue to one side of Wired Braid™ form and place onto sheer fabric. Press with palm of hand to make sure all thread surfaces are touching fabric. Let dry. (Note Liquid Stitch only takes a couple of minutes to dry.)

5. When dry you may embellish each wing. I used a matching Kreinik Blending Filament to make feather stitches from tips of wings to body. I then used tiny matching flat sequins secured with size 15 petite beads for whimsy. (Note: Cartwright sequins have a wonderful selection of tiny sequins - I found these at Sally Beauty Supply in the nail art dept.)


6. After embellishing each wing, carefully cut along the outside of all wings keeping them as one connected unit. You can bend the wings or leave them flat.

I will be sewing beads on top of center joint when I am ready to add it to the finished project. Once again, Thank you Kreinik!!!!!! Something new to play with!

Order Kreinik Wired Braid™ online at http://www.kreinik.com/shops/Wired-Braid.html or from your local needlework store.

By Pat Winter

Read more...

Thread advice from a crazy quilter

Kreinik note: Guest blogger Barbara Blankenship is one of the most talented crazy quilters you will meet. She always inspires us with her creative use of stitches and threads, so we asked Barbara to share some of her top tips for using Kreinik threads in crazy quilt embellishment. Even if you aren’t a crazy quilter, use her suggestions as ideas for incorporating fun embellishments into your own art form.


As an avid crazy quilter, I’ve long been a fan of Kreinik threads. Whether I use it in a seam treatment or motif design, it’s the perfect thread to make the design “pop.”


I love the rich look the Kreinik metallic threads offer. They needle differently than finer threads but don’t let this discourage you. Here are several tips I’ve found helpful:

  1. Use a shorter length of thread. As the metallic thread moves through the eye of the needle it will begin to fray. Shorter lengths will minimize this problem.
  2. Use a larger shank needle when using the heavier threads. If the entry hole is larger the thread will glide through more easily and not tend to fray.
  3. Use a ribbon embroidery needle when stitching with the 1/16 or 1/8” Kreinik ribbon.

I hope the following photos will better explain the beauty this thread lends to your needle and fiber art.

  • I have thoroughly enjoyed exploring the possibilities of using Kreinik’s new Easter Grass ribbon. The most obvious use, of course, is the nest pictured here.
  • Every crazy quilt needs at least one spider web. In this photo I’ve used the Kreinik Tapestry #12 Braid.
  • I used the Kreinik machine sewing thread ZTIC0031 Golden Brown fine twist sewing thread on this acorn needle case. I love the brief glimpse of brown metallic around the outer edges. It’s a very fine thread yet has the strength and durability to stitch the two pieces of wool securely together. This thread is intended for sewing machine use but I’m so glad I tried it for hand embroidery. The blanket stitch around the leaf and bottom edge of the acorn cap is stitched with #8 braid.
  • I love this woven seam treatment using the Kreinik #16 Braid. Lynn Schoeffler introduced this stitch through www.CQMagOnline.com and it’s one of my favorites.
  • These stacked fly stitch pyramids are done using the Kreinik gold Blending Filament.
  • In this seam treatment I’ve couched the Kreinik 1/8” Ribbon. The herringbone and lazy daisies are done with #8 braid along with #4 lazy daisies.
  • In the final two photos I’ve woven cords using various Kreinik threads along with matching fibers. By choosing eight Kreinik threads along with coordinating fibers (and beads) I have created trees, branches and frames. I used the Diva Cord Maker distributed by the Fibergoddess.

What an amazing journey I’ve had discovering all the wonderful things available to the fabric and fiber artist. I am thrilled to be able to share my love of Kreinik threads.


By Barbara Blankenship


Follow Barbara Blankenship at HYPERLINK "http://www.rosesonthewater.blogspot.com/" http://www.rosesonthewater.blogspot.com/ and HYPERLINK "http://cqmagonline.com" http://cqmagonline.com


Read more...

Out of the box: Adding dimension with Wired Braid

"Your company is out of the box," someone told us at the recent TNNA needlework trade show for needlework businesses, designers, retailers, and teachers. "You just don't fit in a box!" We took that as a compliment. It is true that Kreinik threads can be used in all techniques, can be used as is or modified to create new effects, and can be used in ways we've never even considered. It is the creative thinkers of the world that inspire us as thread makers.

A wired Kreinik thread has been requested by some of those creative thinkers for at least 15 years. Some innovators on their own inserted wire into our heavier braids to create dimensional effects (and still do), but they kept asking us to make a wired thread, year after year. We played around with it, but since we manufacture our own threads in our West Virginia factory, we couldn't get the production down to a good process. When DMC came out with their wired thread last year, the requests really amped up. Back to the drawing board—and machines—and we figured it out. We are so excited to debut nine colors in a wired Kreinik metallic we call "Wired Braid." Judging from the positive response at the show, this thread is going to be another valuable tool to bring your creative ideas to life through color, texture and dimension no matter what medium or technique you use.

What can you do with this new thread? Thanks to some of our Facebook friends, here are some ideas for using the new Kreinik Wired Braid™

  • "I'd make Valentines!!!!! Id mix it up, id cross stitch, embroider, outline!" - Amy K.
  • "I'd use wired braid to embellish cross stitch projects, greeting cards, frame photos, so many ideas --- so little time!" - Doris D.
  • "Soooooo many ideas! Create shapes to dangle from mobiles, stumpwork foundations, jewelry..." - Karen C.
  • "Definitely the invites I'd be sending out for all the birthdays coming up over here!" - Amanda R.
  • "I would use it for my fiber art for 3D additions to the pieces. Also I could see incorporating it into some of the coiled wire items I create" - Barb B.
  • "I need to make a cork screw for one of my needlepoint projects. This looks like it would do the trick!" - Carol V.
  • "I have a couple of WIP's that could really benefit from sparkly definition...and one in particular that I wanted to add a word to and this wire would be just spectacular!!!" - Lisa L.
  • "I would use it for the wings of my beaded angels. Definitely use it for mystical cross stitch outlining/couching." - Rowie M.
  • "I would use it to embellish my cross-stitching and other needlework projects." - Kim R.
At the TNNA show, one common question was "How does this differ from DMC's Memory Thread?" To be honest, we haven't used Memory Thread so we can't really compare. However, some designers told us that DMC's is wrapped, whereas with the Kreinik thread, the wire is braided in. This makes it curve and shape nicely. Ours is metallic, of course, and comes in some of your favorite Kreinik colors (like 002, 001, 015, 009). It is available on the tidy classic Kreinik black spool, or on cones in larger amounts (by special order). See more here: http://www.kreinik.com/shops/Wired-Braid.html

If you are couching Wired Braid™ onto your needlework, there are a few handy tips. As with any thick thread that you couch, we recommend that you tape the ends to make it easier to plunge to the back of your work. As Sue Jennings recommended, "Make the tape pointy and the end will act just like a needle." Then couch it with a coordinating color of thin Kreinik Blending Filament, Cord, or Very Fine #4 Braid, or use a clear monofilament sewing thread.

Look for the new wired metallic braid in needlework stores (Hot-Wire colors carry a "W" after the color number). Look for it to "pop up" (pun intended) in designs and stitch guides coming out this year. Visit http://www.kreinik.com/shops/Wired-Braid.html for a color chart and more information. And most of all: have fun with this new dimensional embellishment thread.

Read more...

Let it snow, let it snow, let it snow...

...IN your needlework, that is! Recently we polled our Facebook friends to see which Kreinik thread they liked to use to replicate snow in their needlework. Hands-down Kreinik color 032 Pearl is the favorite, but some add a touch of blue to their snow with colors like Kreinik 194 Pale Blue, 9400 Baby Blue, 1432 Blue Ice, 094 Star Blue. How do you like to capture that cool crystalline coating in your needlework?

Snow is sparkly in real life, and the easiest way to make it sparkly in projects is with metallic threads. If you would like to try blending shades to create a snow scene, look for the Kreinik Metallic Gift Collection: Snowflake, available online at www.kreinikmall.com (in Kits & Collections), which has several different "snowy" shades in one boxed set. Want something really different and fun? We recommend Kreinik Ombre 3200 Pearl in the Satin Stitch for snow drifts.

Here are some responses from our Facebook poll.

  • Blending filament in pearl (sometimes with white thread) makes a sparkly snow .... and for that morning sun hitting the snow look blending filament in Starburst (over white or alone) mixed in with some plain white stitches seems to do the trick! - Loretta O.
  • 032 - in all sizes - sometimes with #4 or #8 when I really want shading in the painting to show through - sometimes #12 when I want full coverage - and #16 when I am using 13 mesh. It is the "best" snow !!! - Betsy H.
  • Pearl Blending Filament (032) I love the twinkle it adds! - Maggie M.
  • 032 blending filament looks most realistic. I'm looking forward to trying the new hologram threads. I think a scattered stitch of silver might be interesting. - Karen C.
  • I use 032 and 100 on needlepoint canvas. I use a lot of your 1/8 and 1/16 ribbon for projects too. I use 4005 what a great metallic thread. It amazes me how this color can change depending on what color is next to it in a design. - Diana M.
  • 032 bf looks the best for getting the sun glittering on the snow look - Margaret S.
  • I like the 032 #4 braid. - Deborah K.
  • Love the sparkle of 032! - Diane S.
  • Have to agree, Pearl Blending Filament (032)! - Niina K.
  • That's funny cos I have to agree with the others, blending filament 032. Just adds enough sparkle without hiding the white I use underneath. So pretty for a subtle sparkle. - Mandy F.
  • My favourite for sparkly snowflakes on white fabric is 094 Blending Filament. But I'll use 032 on all colours. I love the shimmer and sparkle of Kreinik! - Doris D.
  • When I was a kid, I always colored snowflakes/snow with a light blue crayon (as white never showed up on white paper!). I still like to add a hint of blue in my stitching. :) 094 is pretty and I like the look when added to white floss. - Diane Z.
  • I use 032 Blending Filament when I'm doing a winter scene. I like the idea of trying 094 on white floss though, so maybe I'll try it on my next project. - Sharon T.
  • An 032 fan - have in #4, #8, 16 braid - must try the blending filament! - Melita G.
No need to shovel embroidered snow. Just stitch and enjoy the pretty effects of metallic thread sparkle on your project.

Read more...

Search This Blog

About This Blog

News direct from thread maker Kreinik Mfg. Co., Inc., located in Parkersburg, West Virginia. Visit our factory outlet store when you are in the area; call for hours 1-800-537-2166.

  © Template by Ourblogtemplates.com

Back to TOP